In case you don't feel like re-reading the previous posts, the short version is that I took my inspiration from these guys on the painted ceilings in the Hall of Kings at the Alhambra:

Now, even though these guys are hunting, my outfit was for a more fancy kind of occasion. So, I was looking for a more luxuriant look. I ended up choosing velvet - a cotton velveteen, actually, for reasons of cost. While it does look great, I felt it was a bit more drapey than this project called for. So, I used a medium-weight linen canvas to back it. Since I wasn't using totally historic materials anyway, I ended up just using a light-weight cotton for the lining. I used some bias-cut strips of silk to face the areas where the buttonholes go.
I did not quilt this jupon. This was not entirely due to laziness, I promise! I felt that the texture of the velvet, which is what gives it such a marvelous look, would be interrupted by the quilting stitches in an un-pleasant way. The one surviving garment of this style is quilted (and is made from a silk brocade, so it can't be dismissed as a technique only for "practical" clothing). Most images of jupons do have lines that seem to indicate quilting. However, not all of them do. There's an argument to be made that this could simply be an artistic choice. But, I also think it's reasonable to choose not to quilt it.
Unfortunately, I didn't take a lot of pictures throughout the process. The torso, based as it was on a reasonably well-done basic block, fit fine. I realized on fitting the body before attaching the sleeves, that because of the grand-assiette style sleeves, nearly all of the wearing ease at the chest could be eliminated. This required a few tweaks to the upper sleeves.

This was my attempt to confirm the size and shape of the gores in the upper sleeve. I cut the slits and then pinned the sleeves on top of the body. Ultimately, trying to do this by myself meant that I didn't get very far, but the shapes and sizes of the openings created by pinning it in this way and putting it on seemed to mostly match the shapes and sizes of the gores.
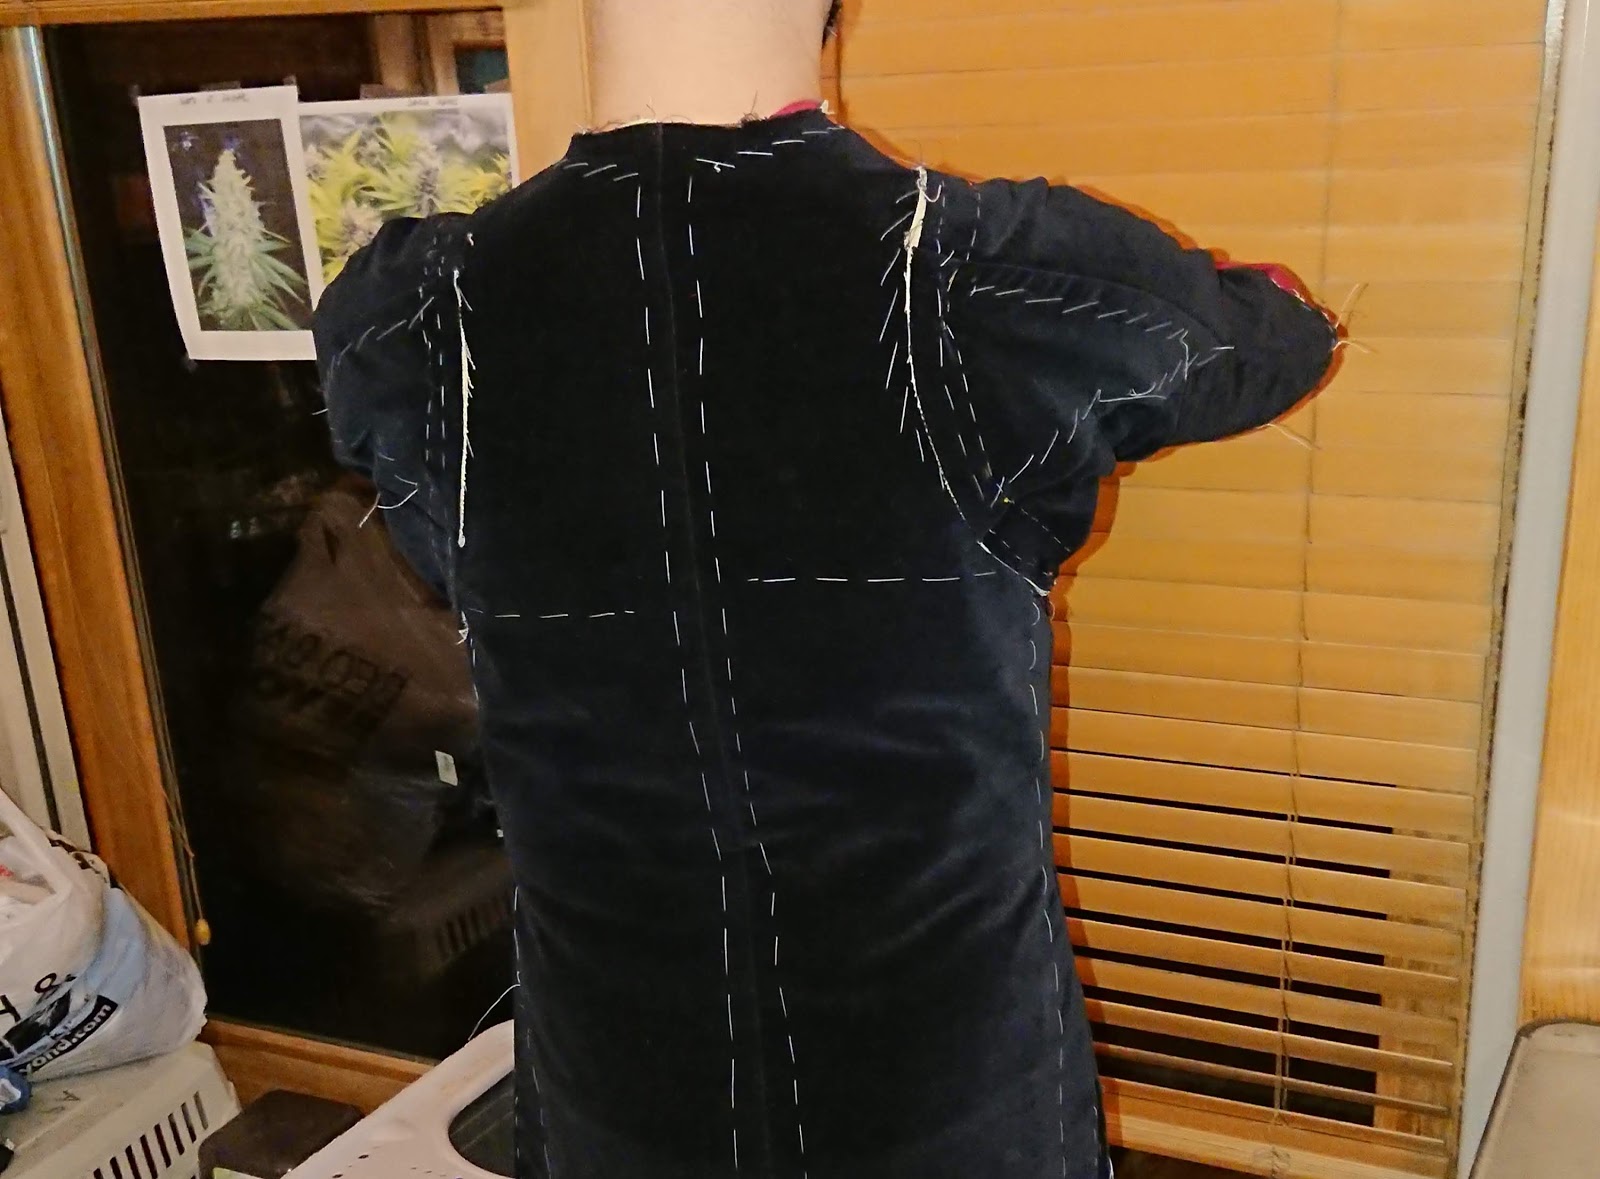

So, this is how they looked with the gores set into the slits and pinned in place. I got a friend to help me fit the exact shape of the armholes after this. I suspect that having done this once, that a second attempt would require even less fine-tuning. Part of the key here is that the tips of the gores should sit along the line that a "normal" armhole would make on the body. Because of the way the upper sleeve was drafted, this means that the armhole along the side seam actually has to be a bit further from the "normal" armhole that it does on top of the shoulder. This can be calculated, but I think there's probably more factors that I haven't realized yet. I also used the fitting to determine exactly how high the slits at the bottom of the side seams needed to be to allow for full range-of-motion at the hips.

These are the upper sleeves, one inside-out. You can see the cone shape that the gores create. I do kind of like this as a solution to creating a fitted garment which still allows for good shoulder range-of-motion.

Here is one of the lower sleeves, before being attached to the upper sleeve. It was constructed in its entirety, including the lining and all the buttonholes before attachment. Because I did "cheat" with some machine sewing, this was actually a much easier way to do it. It's also undoubtedly the way one would do this with construction entirely by hand. I stitched this to the bottom of the upper sleeve, then stitched the upper sleeve lining on and basted it up into place. This leaves all the seam allowances turned up, away from the elbow, which I think is desirable. Likewise, I stitched the upper sleeves, lining and all, into the armholes. This left those seam allowances to be pressed toward the body, which I'm not sure about. But it seemed to work out ok.
The body lining was assembled and partially bagged, so I could do some of that stitching on the machine. But, I did tack the lining seam allowances to the outer fabric's seam allowances. The buttons are a bit large for this era, but the design of these particular buttons struck me as very suitable for this project. The spacing is a bit much, too, even for the size - but that's how many I had.

And, here's the finished product. Unfortunately, it's hard to photograph velvet and most of the detail of the construction gets lost.


The hood is made exactly on the pattern of Norlund's type B hoods, out of a changeable silk taffeta with a plain silk lining. I really should have a plaque belt, but I am not committed to this time period enough to spend that much money on jewelry. So, I used a somewhat lower class belt that is still appropriate to the period. The hosen were purchased and are not proper bias-cut hose, though I did use garters below the knee.
No comments:
Post a Comment